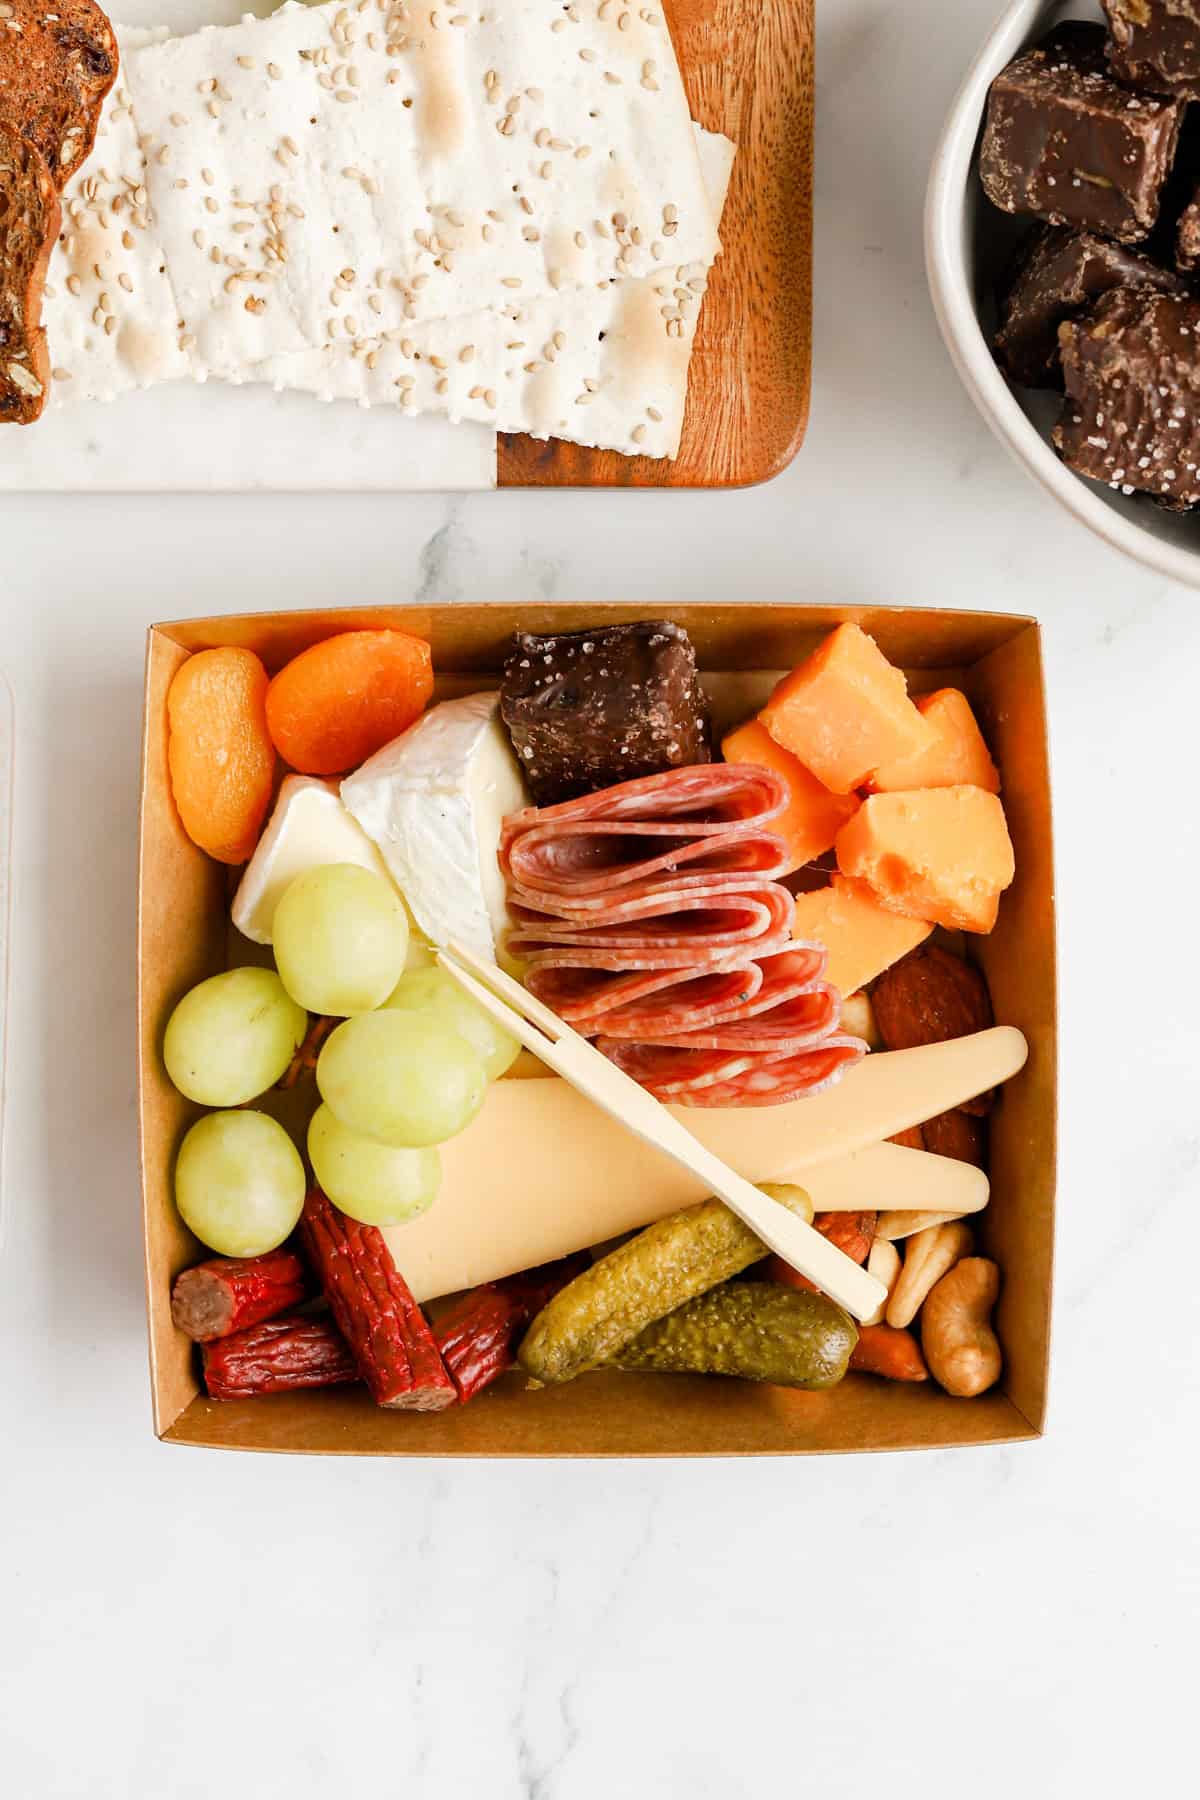
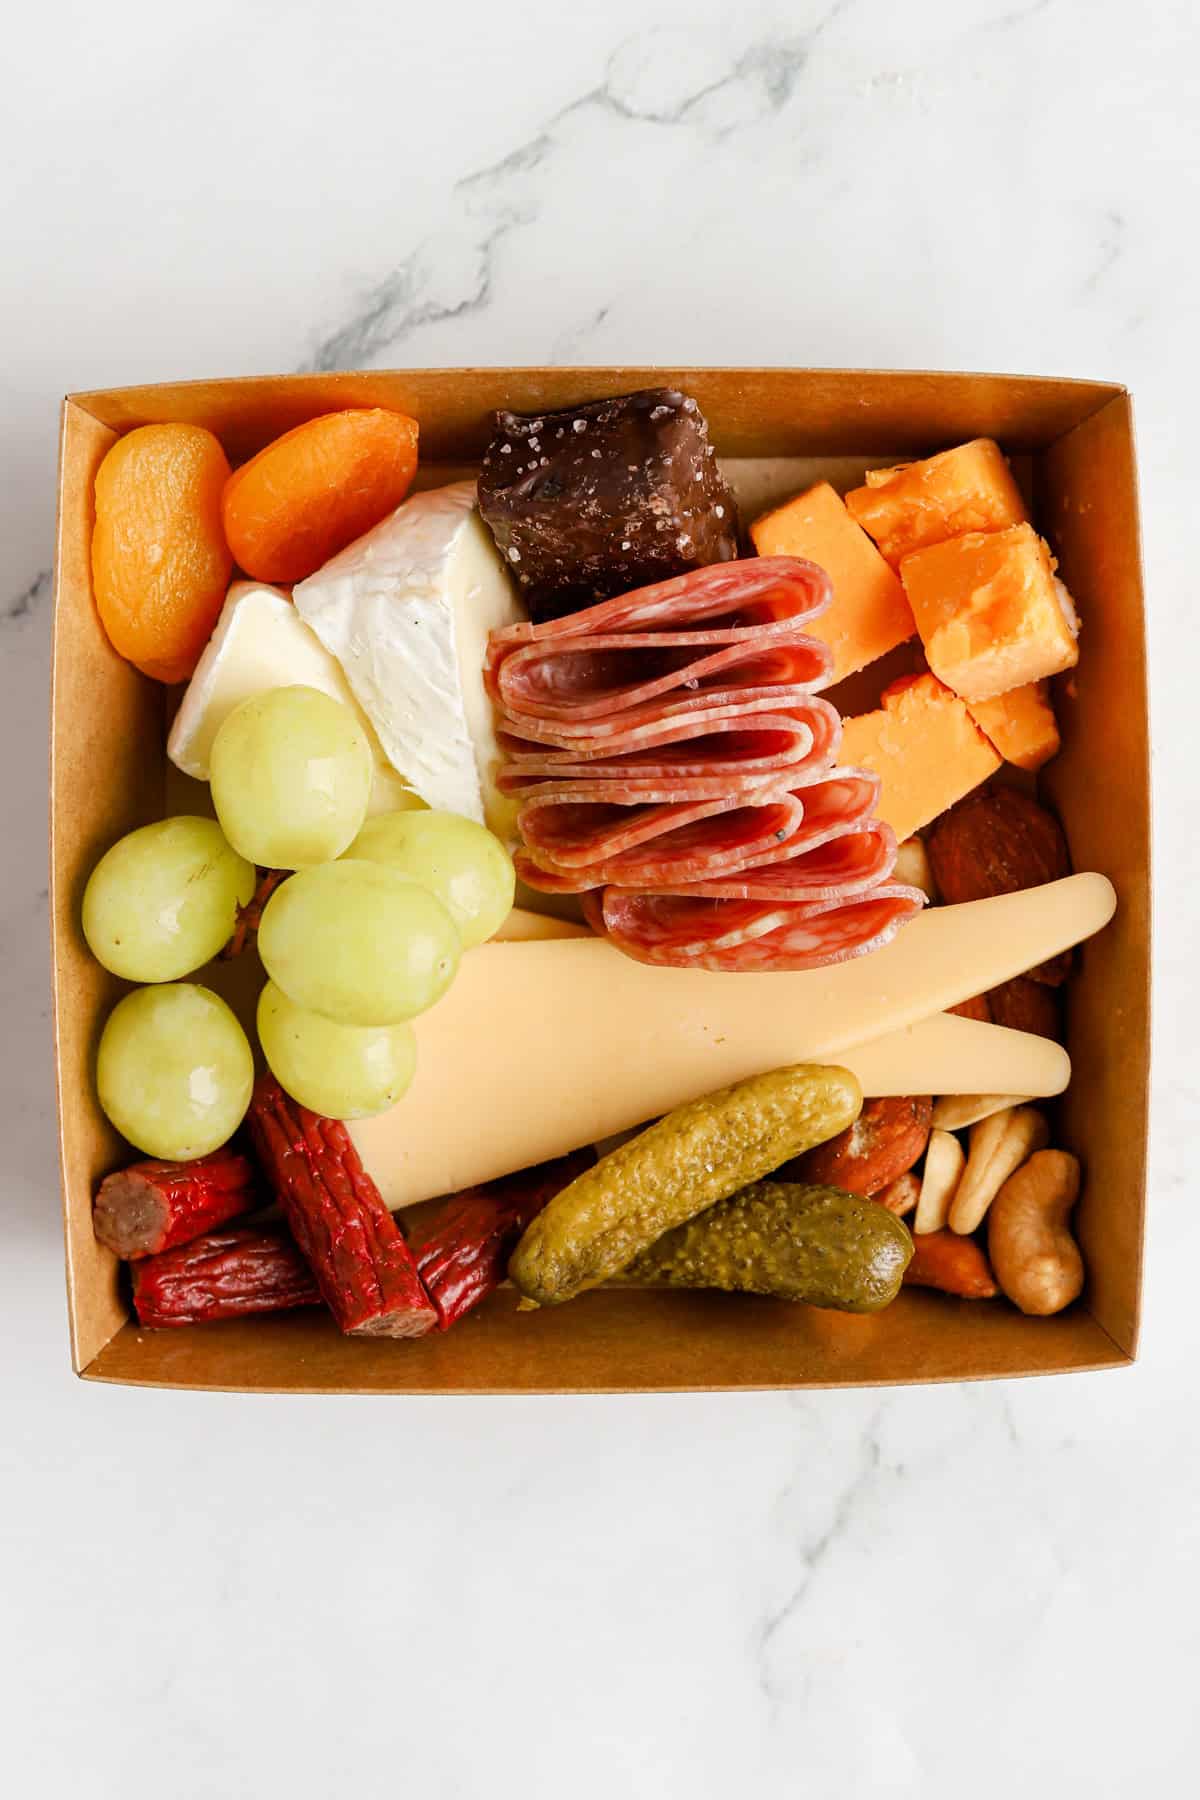
Individual charcuterie boxes are an easy way to serve cheese, meat, and accompaniments for parties, showers, corporate events, gifts, or even simple lunches. They’re portable, customizable, and make entertaining feel special without requiring a lot of cooking.
This guide will walk you through exactly how much food to include, what packaging works best, and how to assemble boxes that look as good as they taste.
The charcuterie trend is still going strong, with more creative ways than ever to serve cheese and all its accompaniments and it’s not going anywhere anytime soon.
The possibilities and combinations of cheese, meat and sides are endless. They’re fancy enough for a bridal shower, but also practical enough for an easy lunch or casual get-together. The best part is you can customize them for literally any occasion.
Charcuterie Box Cheat Sheet
- Choose a food grade box with cover or lid that’s between 4×4 and 5×5 inches
- 3 oz. of cheese and 1.5-2 oz. of meat per person
- Pick 3-5 accompaniments
- Serve crackers on the side for best results
- To build – cheese, meat, fill gaps
Packaging Options
Disposable containers are the best options when creating these beautiful charcuterie boxes for a gathering or party. Aim for a small box with around 20 square inches of space. Something in the 4×4 to 5×5 range works perfectly. The boxes I used were 4.75×4.33 inches. Make sure the supplies are made of food grade material.
Some options include a cardboard box with a clear plastic lid or a cardboard box with hinged lid that have a clear window on top.
This same concept for charcuterie boxes can be used to create individual charcuterie boards on small wooden boards, palm leaf boards or small plates.
Charcuterie Box Ingredient Guide
This isn’t a rigid recipe. It’s more of a build-your-own formula so you can mix and match based on what you love (or what you already have on hand). Portions shown are assuming the boxes will be served as a hearty snack, appetizer or light lunch.
Cheeses
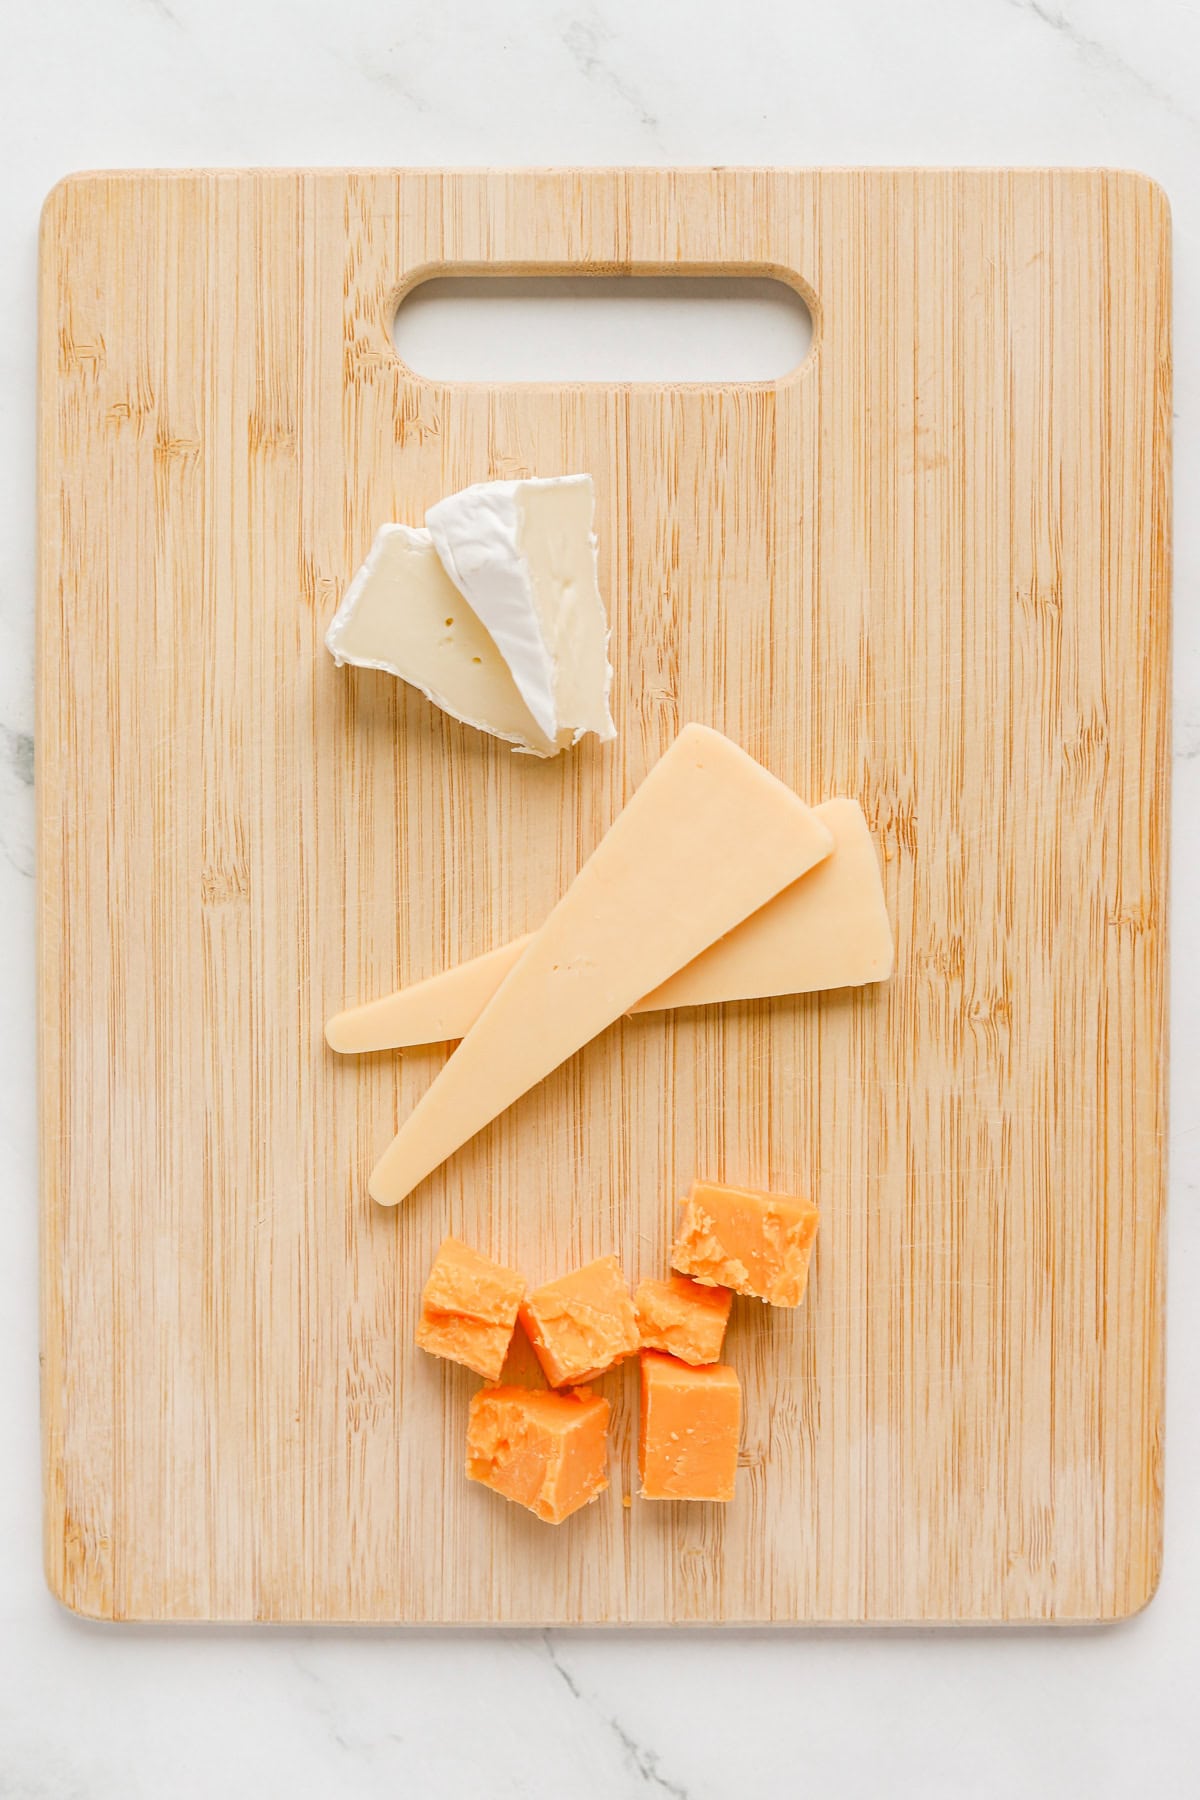
This is where you can really play with textures for the box. Pick 3 different cheeses ranging from soft & spreadable, to firm & sliceable, to aged & crumbly. Using one from each category creates a fun tasting experience.
- Soft & spreadable: Goat cheese (chèvre), Boursin, Brie, Feta, Mozzarella
- If this cheese is very soft, place it in small cups or keep rind intact to avoid mess
- Sliceable: Manchego, Gruyere, Gouda, Cheddar, Edam
- Cut into triangles or cubes
- Crumbly: Aged cheddar, Parmesan, Pecorino, Gorgonzola (blues are strong and can dominate the box so use with caution)
- Break hard cheeses into bite size chunks
Portion for one box: 3 ounces of cheese total.
Meats
Charcuterie technically refers to a variety of cured or smoked meats although you can absolutely make meatless charcuterie boxes (aka “cheese boxes”), and they’re just as good.
For these individual boxes, I used two types of meat to make them feel a little heartier, but you can absolutely stick with just one to keep things simple.
- Thinly sliced meats
- Prosciutto, Genoa salami, dry salami, soppressata, or summer sausage
- Meat sticks
- Cut into 2-inch pieces. They add a nice contrast to the sliced meats. Go with your favorite turkey, pork, or beef sticks.
Portion for one box: Between 1.5-2 oz. total.
Suggestions feature portions and amounts for one box. Scale items for the number of boxes you want to make. Example: If making 10 boxes, you’ll need 30 ounces of cheese total.
Accompaniments
This is where you get to have a little fun. Once your cheese and meat are set, the accompaniments fill in the box and tie everything together. A little goes a long way here and just a couple pieces of each is plenty for an individual box.
Savory (choose 1-2)
- Nuts – Mixed nuts, almonds, walnuts or pistachios. Seasoned or plain. Great for adding crunch alongside softer cheeses.
- Something pickled – Baby dill pickles, cornichons, green olives (stuffed or unstuffed). Pickled items stand up well to aged, rich cheeses. Dry these items with a paper towel before adding to the box.
Sweet (choose 2-3)
These create a fun contrast to the otherwise savory items in the box.
- Fresh fruit – Strawberries, blackberries, blueberries, or grapes. Choose fresh fruits that can be used whole and that aren’t too fragile or juicy. Dry fruit well before adding to the box.
- Dried fruit – Apricots, cranberries, cherries, pineapple or figs.
- Chocolate – Chocolate covered nuts, chocolate covered pretzels, truffles or chocolate covered caramels
- Spreads – You can purchase small 1 oz. containers of jam or honey, or portion some into a plastic portion cup with lids like these.
These accompaniments are box fillers and do not have a set portion amount. Amount will vary on your preference and item size. Have fun with it and use what you’d like to eat!
Crackers
There is some debate on whether crackers should be included inside or outside the box. Unless you will be enjoying the boxes right away, I would suggest packing the crackers separately. This ensures the crackers stay crisp and you have more space for the other goodies. Plan for about 6-8 crackers per person, depending on the variety and size.
Serve crackers separately in:
- A small zipper bag – You can purchase “fancier” looking ones than your traditional zipper baggie.
- Cellophane bags – Tied with twist tie or ribbon
- Prepackaged individual servings of crackers. This works well for large groups. Display crackers in a bowl or tray next to the boxes for guests to grab.
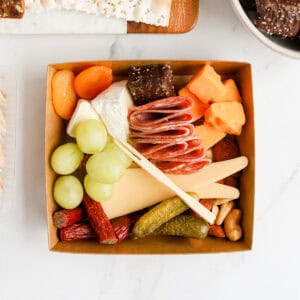
How to Assemble a Charcuterie Box
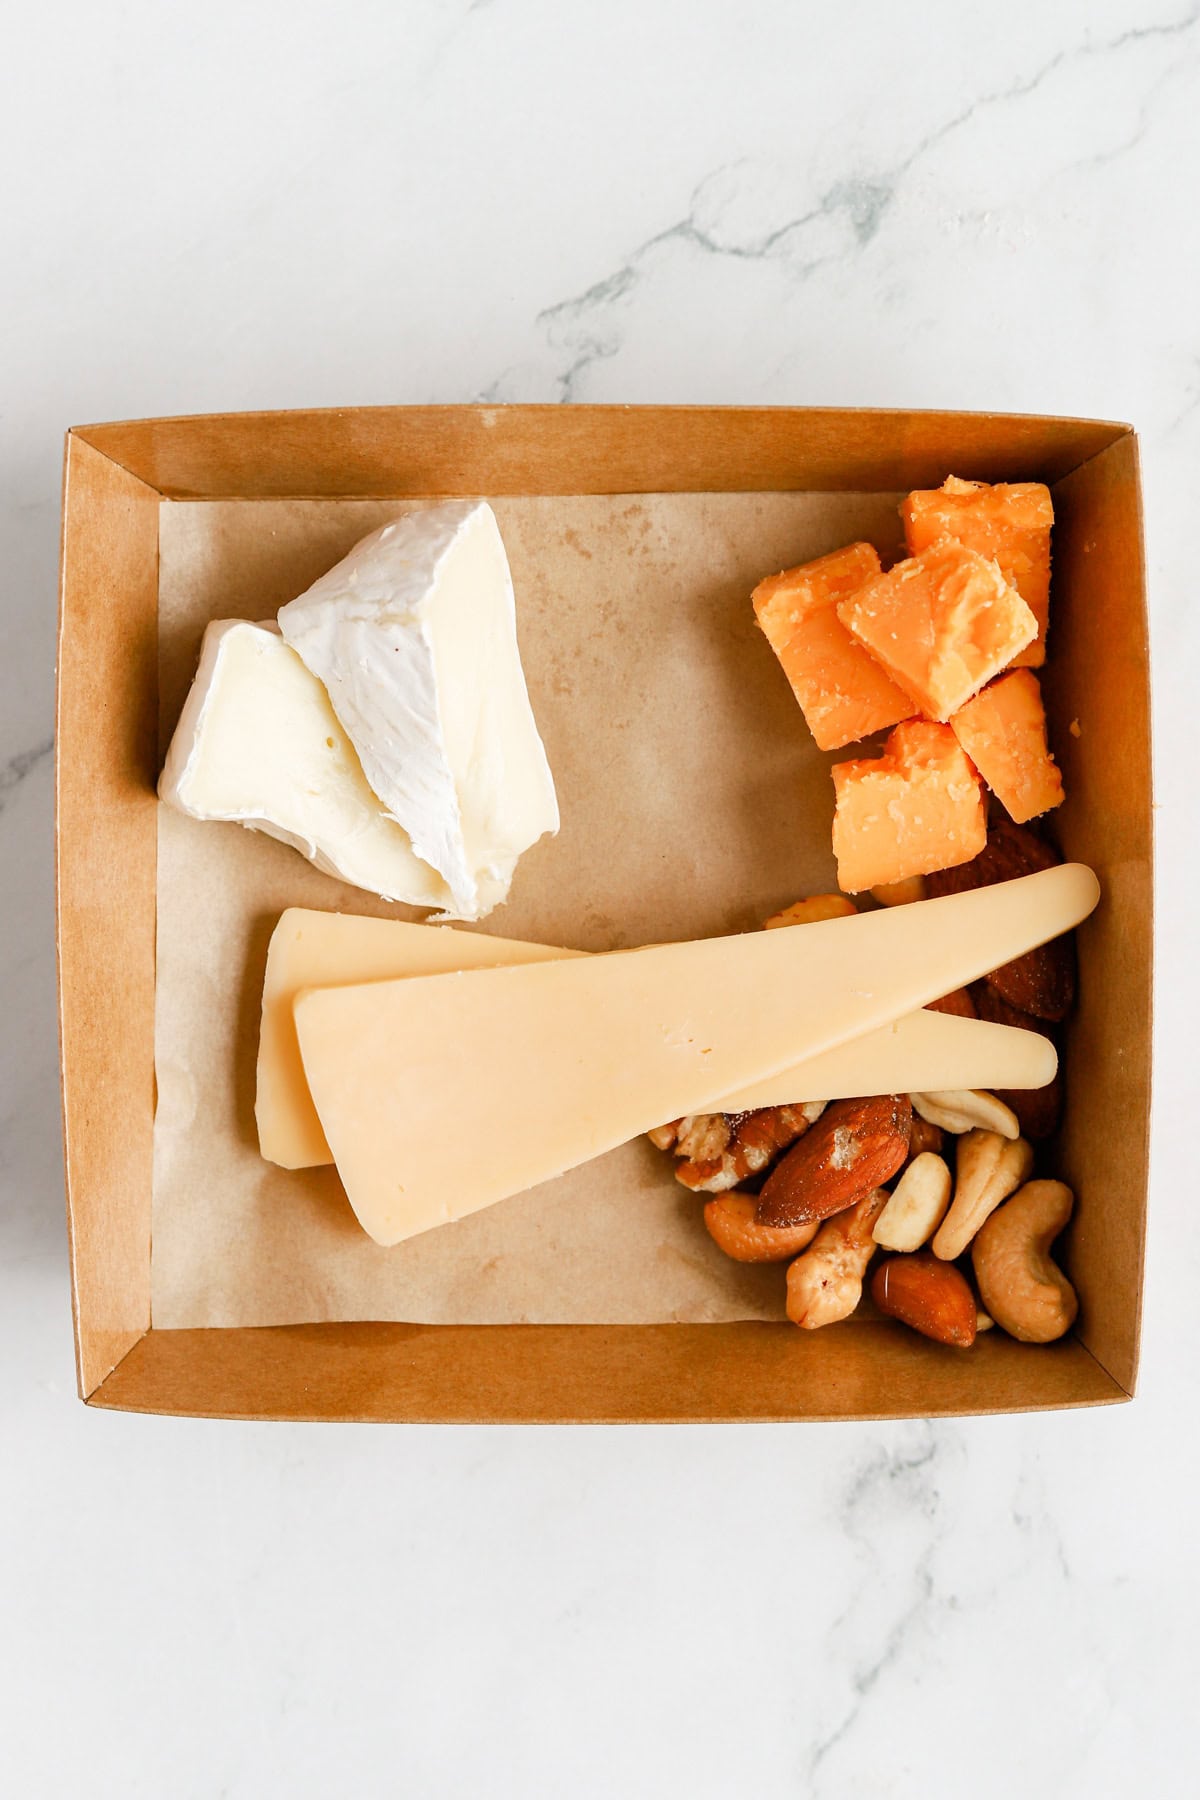
Step 1: Assemble your boxes, if necessary. Line the bottom of each box with a square of parchment or wax paper. Add some whimsy by adding a patterned or colored paper!
Step 2: Prep and portion – It works well to cut and portion all your meats and cheeses before assembling. Then you can work in an assembly line method to make all the boxes.
Step 3: Start with the cheeses as your anchors, spacing them out in the box. If you’re using longer wedges or slices, add a small layer of nuts or fillers underneath to prop them up and create a little height.
Step 4: Add the meat. Some simple folding into halves or quarters really elevates the look and creates dimension. These fun salami roses could also be used. Tuck meats around cheeses in a couple different spots.
Skewering cheese, fruit or meat is another option to create more dimension in the box. Check out these Charcuterie Skewers!
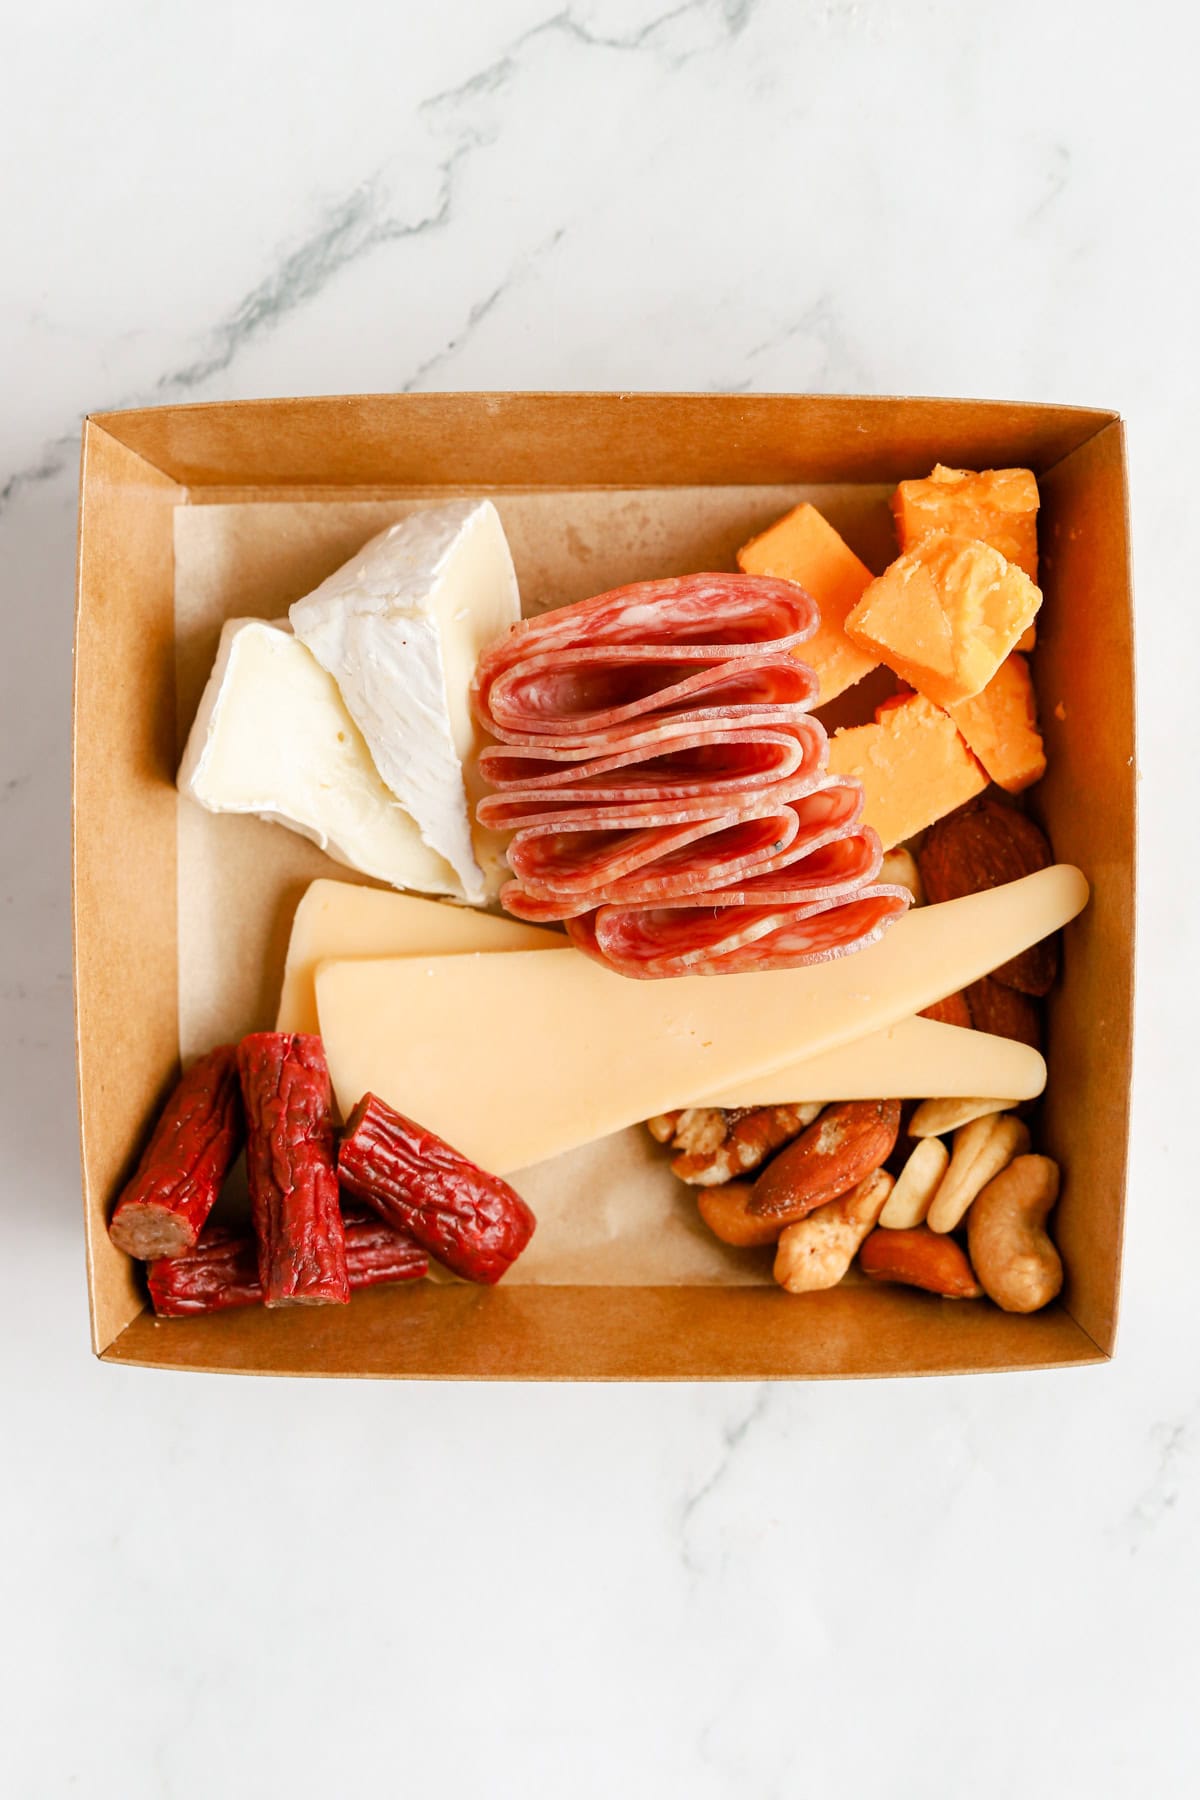
Step 5: Fill in the gaps with your other sweet and savory accompaniments. You want the box to look full but not piled. Try to create a variety of colors, sizes and textures throughout the box. Place certain things like pickles near a cheese you think it should be eaten with. This takes out the guesswork!
If your box starts to feel a little tight on space, that’s okay. The cheese and meat are the stars and everything else is delicious, but extra. Scale back the accompaniments if needed.
If serving soft cheeses, jam or honey, be sure to include a small disposable knife or sample spoon. Bamboo cocktail forks are also nice to include to pick up other items, but are optional.
Common Mistakes To Avoid
- Overcrowding the box. The box should look full without big gaps, but it also shouldn’t look like you piled everything in.
- It looks boring. Be sure to add items that are a variety of different colors. We eat with our eyes first!
- Too much of the same texture. Aim for a mix of creamy, crunchy, sweet, and salty in every box.
Charcuterie Ideas For Every Occasion
These boxes are perfect for everyday life, but can also be customized for a variety of holidays, parties or celebrations. They also make a great little gift!
- Kids boxes – Mild cheeses, fun snacks, a little candy treat
- Date night– Favorite cheeses + a good bottle of wine
- Holidays – Match colors and flavors to the season. Example: red & green for Christmas, pastel colors for Easter.
When serving charcuterie boxes, remove them from the fridge about 30 minutes before serving. Cheeses and cured meats taste better when allowed to come close to room temperature. For food safety, do not leave boxes out of the fridge for longer than 2 hours.

Storage Tips
Charcuterie boxes are best enjoyed within 24 hours of assembly. Fresh fruit, crackers, and soft cheeses tend to lose quality the longer they sit.
If you’re making boxes for an event, all cheeses and meats can be cut and portioned 1-2 days in advance. Store them separately in airtight containers until you’re ready to assemble.


Charcuterie Snack Boxes
Equipment
- Disposable box with lid between 4×4 and 5×5 inches
Ingredients
- 3 oz. cheese For best variety, include a mix like brie or goat cheese (soft), havarti, cheddar or gouda (sliceable), and parmesan or aged cheddar (firm).
- 1.5-2 oz. cured or smoked meats Salami, prosciutto, or summer sausage
- 1-2 savory accompaniments Nuts, olives, or pickles
- 2-3 sweet accompaniments Fresh or dried fruit, chocolate, honey or jam
- 6-8 crackers Packaged separately
Instructions
- Assemble boxes if needed and line with parchment or wax paper.
- Cut and portion cheeses and meats for easy assembly.
- Place cheeses in the box first, spacing them out evenly.
- Fold or tuck meats around the cheeses.
- Add sweet and savory items to fill the box, creating a variety of colors and textures.
- Package crackers in a separate bag to keep them fresh.
Notes
Did you make this recipe?
Did you make this recipe? Leave a comment and star rating below. I’d love to know how it turned out!

From My Kitchen to Yours
Get approachable, family-friendly recipes and simple ideas for making mealtime more meaningful delivered straight to your inbox.