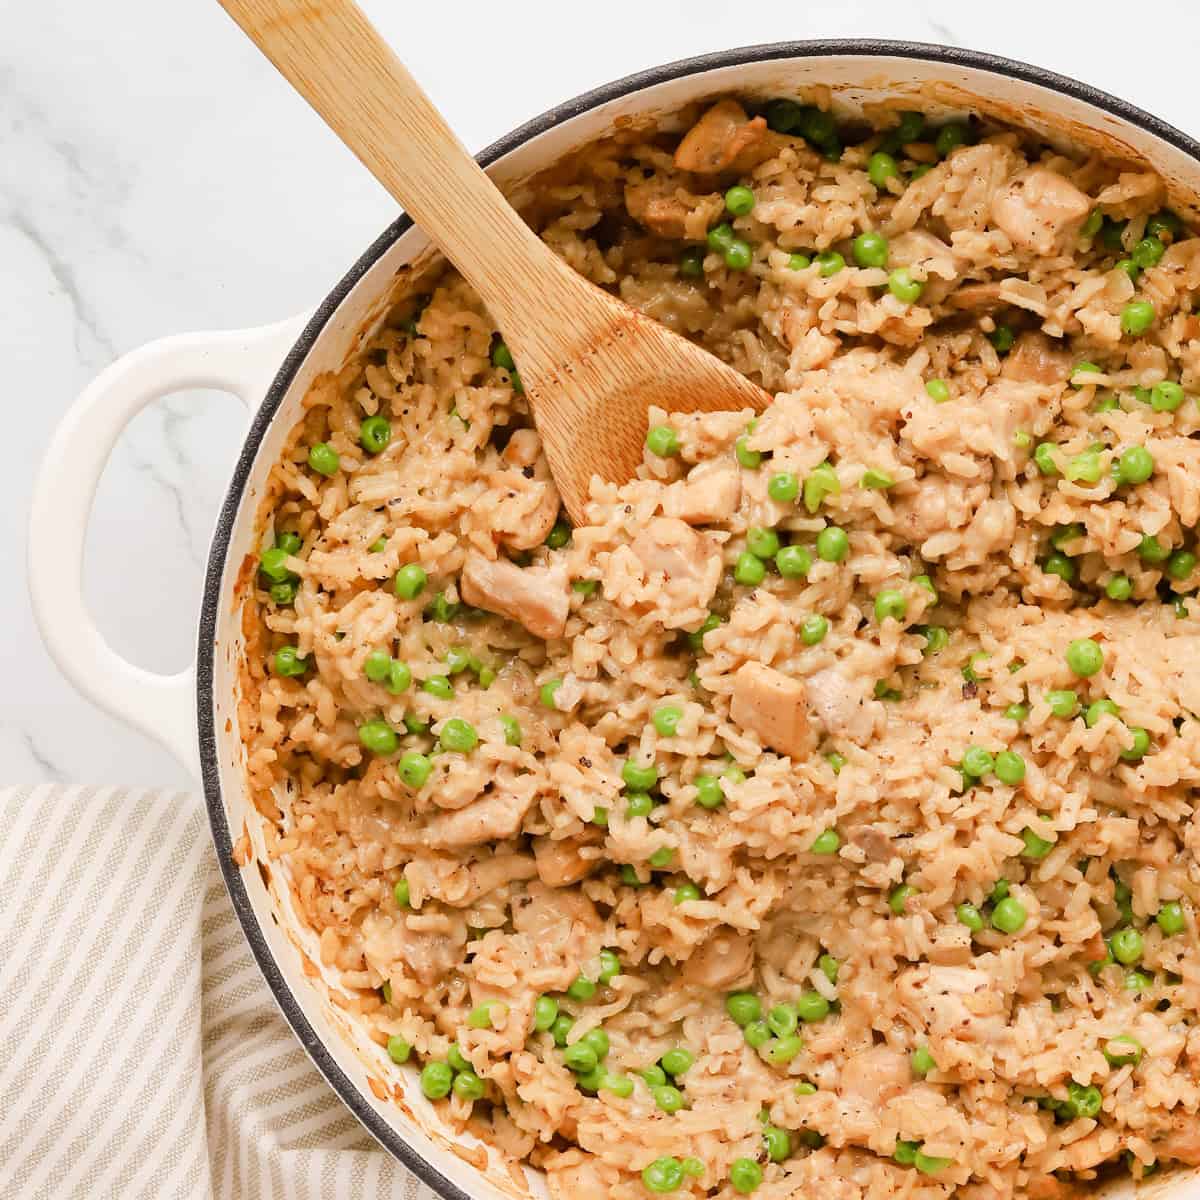
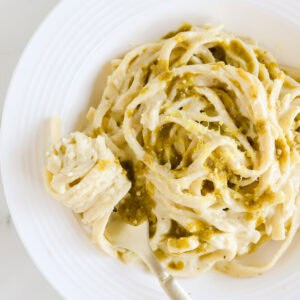
Baked Chicken Risotto (Easy No-Stir Method)
This easy oven-baked chicken risotto is creamy, comforting and stress-free. A one-pot recipe that makes risotto easy enough for weeknight meal or fancy enough for a dinner party.

Picture this: you are sitting at a fancy restaurant (kid-free). You order off the menu and enjoy the creamiest, most flavorful risotto along with a glass of fine wine. If you've heard anything about risotto, you know that it often requires a lot of attention to make and you truly savor this special treat on your night on the town.
Okay, back to reality. We all can dream, right? Reality is that on busy weeknights with three busy girls, I just want to get dinner on the table that's easy as well as delicious. This recipe may sound fancy, but it's also kid-approved!
Jump to:
Key Ingredients for the Best Baked Chicken Risotto
Here are a few helpful tips on the ingredients. For a full list of ingredients, check out the recipe card below.
- Chicken thighs - I love using boneless skinless chicken thighs because they don't dry out as easily as breasts (and they're cheaper!).
- Seasonings - Salt and lemon pepper give the chicken a bright, zesty flavor.
- White wine - They say to cook with a wine you'd drink, but I'm not a huge wine drinker. I typically have a bottle of white cooking wine from the grocery store in my fridge for recipes like this. Otherwise a dry pinot Grigio, sauvignon blanc or a chardonnay would work well. It gives the recipe a hint of acidity and enhances the flavor of the dish.
- Arborio rice - A short grain Italian rice that has a high starch content making it perfect for dishes like creamy risotto
- Chicken broth - Store-bought or homemade
- Milk - Adding it will help with the silkiness of the risotto.
- Parmesan cheese - Melts into the risotto for a rich, flavorful and cheesy finish!
- Peas - Frozen peas actually work best. Adding them during the last few minutes of cooking ensures they don't get mushy.
Step-by-Step: How to Make Baked Chicken Risotto (No Stirring!)
Traditional risotto demands stirring, ladling, and patience. This version? The oven does all the heavy lifting.
Step 1: Prep the chicken - Season thighs and sear until golden. They won't be fully cooked at this point. Remove and set aside.
Searing the chicken adds so much flavor to the dish. Don't skip this step!
Step 2: Build the flavor - Sauté onion and garlic, then deglaze with white wine to release all that flavor.
Deglazing the pan releases all those yummy bits back into the dish. And don't worry, the alcohol will all cook off.


No wine? No problem! - Feel free to substitute more chicken broth in place of the wine if you don't have any or prefer not to use. Add a squeeze of lemon juice after baking the risotto to replace that hint of acidity.
Step 3: Add rice & broth - Add the rice. Sauté the mixture for a couple minutes until the rice just begins to turn translucent. Add the chicken broth and chicken chunks back in and bring the mixture to a simmer, cover and move to the oven. No more standing over the stove!


Step 4: Bake - Bake the risotto for 30 minutes covered. After baking, the risotto should be tender but still have a tiny bit of "bite" (al dente). If it feels too chewy, add ½ cup broth and bake a little longer.
To finish the risotto add milk, parmesan cheese and frozen peas. Bake the risotto for another 10 minutes to heat everything through and allow the rest of the liquid to absorb.

Serving Tips
This dish doubles as a creamy chicken and rice bake. It's hearty enough to serve on its own, but also pairs beautifully with a green salad or garlic bread. Serve it hot right out of the oven.
I always like to top my risotto with some extra parmesan cheese and a dash of black pepper.
Storage & Reheating
Storage: Keep leftovers in an airtight container in the fridge for up to 3 days.
Reheating: Stir in a splash of broth or milk before reheating on the stovetop or in the microwave to bring back the creaminess.
Freezing? Not recommended. Risotto tends to get grainy when thawed.
Easy Variations & Swaps
Protein: Swap thighs for chicken breasts or shrimp.
Cheese: Try Gruyere, Fontina, or Pecorino for that rich flavor.
Veggies: Mix in sliced mushrooms, zucchini chunks, asparagus pieces, or broccoli florets instead of peas.
Dairy-Free: Sub plant-based milk and cheese.
Chicken - Use chicken breasts instead!

FAQ
A dutch oven, braiser or other oven safe skillet with cover will work for this recipe. Just be sure the handle and cover are ovenproof so it can go right from the stove to oven. Pans like these are heavy-bottomed and can withstand high heat and maintain heat evenly.
Arborio is best because it releases lots of starch, giving risotto that signature creamy texture. If you can't find it, sushi rice is your closest match but risotto will not be as creamy. Pearled barley or farro work too, but they'll give you a nuttier, less creamy result.
Arborio rice is naturally gluten-free, but double-check your broth labels to be safe.
Loved this baked chicken risotto? Be sure to check out my other easy one-pot dinners and comfort food favorites. Perfect for busy weeknights.
Other Main Dishes You'll Love

Be sure to follow The Darling Apron on Facebook & Instagram along with what I'm pinning on Pinterest!
Have you made one of my recipes? I'd love your feedback on the comment box and star rating below the recipe! ⭐️⭐️⭐️⭐️⭐️
📖Recipe
📖 Recipe
Baked Chicken Risotto (Easy No-Stir Method)
Ingredients
Method
- Preheat oven to 350 degrees.
- Heat 1 tbsp. of olive oil in a 6-quart Dutch oven over medium-high heat. Season chicken thighs with salt & lemon pepper. Add to the Dutch oven and brown 4-5 minutes until the chicken has some nice color (doesn't have to be fully cooked). Remove chicken from the pan.1 # chicken thighs, 1 tsp. salt, 1 tsp. lemon pepper
- Add another 1 tbsp. olive oil to the Dutch oven. Add onion and sauté 2-3 minutes. Add garlic and sauté another minute. Add white wine and scrape all the bits off the bottom of the pan.1 cup yellow onion, 2 cloves garlic, ¼ cup white wine
- Add arborio rice and stir frequently until the rice just begins to turn translucent, 1-2 minutes.1 ½ cups arborio rice
- Stir in chicken broth and add the chicken pieces. Bring the mixture to a simmer, then cover and bake in the oven for 30 minutes.4 cups chicken broth
- Stir in milk, parmesan and peas. Place back in the oven uncovered for another 10 minutes until most of the liquid is absorbed.½ cup milk, ½ cup parmesan cheese, 1 cup frozen peas


this recipe was so easy and SO GOOD. Adding it as a repeat for winter cozy mealtimes. I dont have a Dutch oven or anything, so just did the first few steps on the stove top, and then finished in the oven in a glass cake pan with a lid. Also added extra peas and that didnt make a difference- turned out awesome. Can't wait to make again!!